Thursday, May 21, 2020

Decorations for my Dad's 90th Birthday Party


     I made a lot of decorations for my Dad's Ninetieth Birthday party.     The colors were blue and gold and white and we were playing up the "90." We invited 125 people, sat up 88 chairs and they all were full.   My Dad enjoyed it and gave a 15 minute speech about his life and major things that had happened.   Family and friends shared funny stories, special memories and shared how proud there are of him and what a wonderful person he is.  I planned a Rail Road theme -- my Dad's first job was for the Rail Road and there were so many cute ideas to use. The invitations were a train ticket, they were the best!!!   We made a slide show and a video to share.  I borrowed a Cricuit from a friend and made the banners.  I had a banner over every table and wall, the turned out huge!  I wanted them to be seen.. and they were.  I made big glitter gold and blue 90 "picks" for the centerpieces.   I borrowed the centerpieces from an organization I belong to.    I made fans and made a back drop for a photo backdrop and a huge 90 that I put photos on(will have to show  more of those  and other things later.)  I made fun glasses that looked like 90.  It was a lot of work, but it was fun!!!   One of my friends volunteered to help me with a lot of it.  She is such a sweetheart!!! 


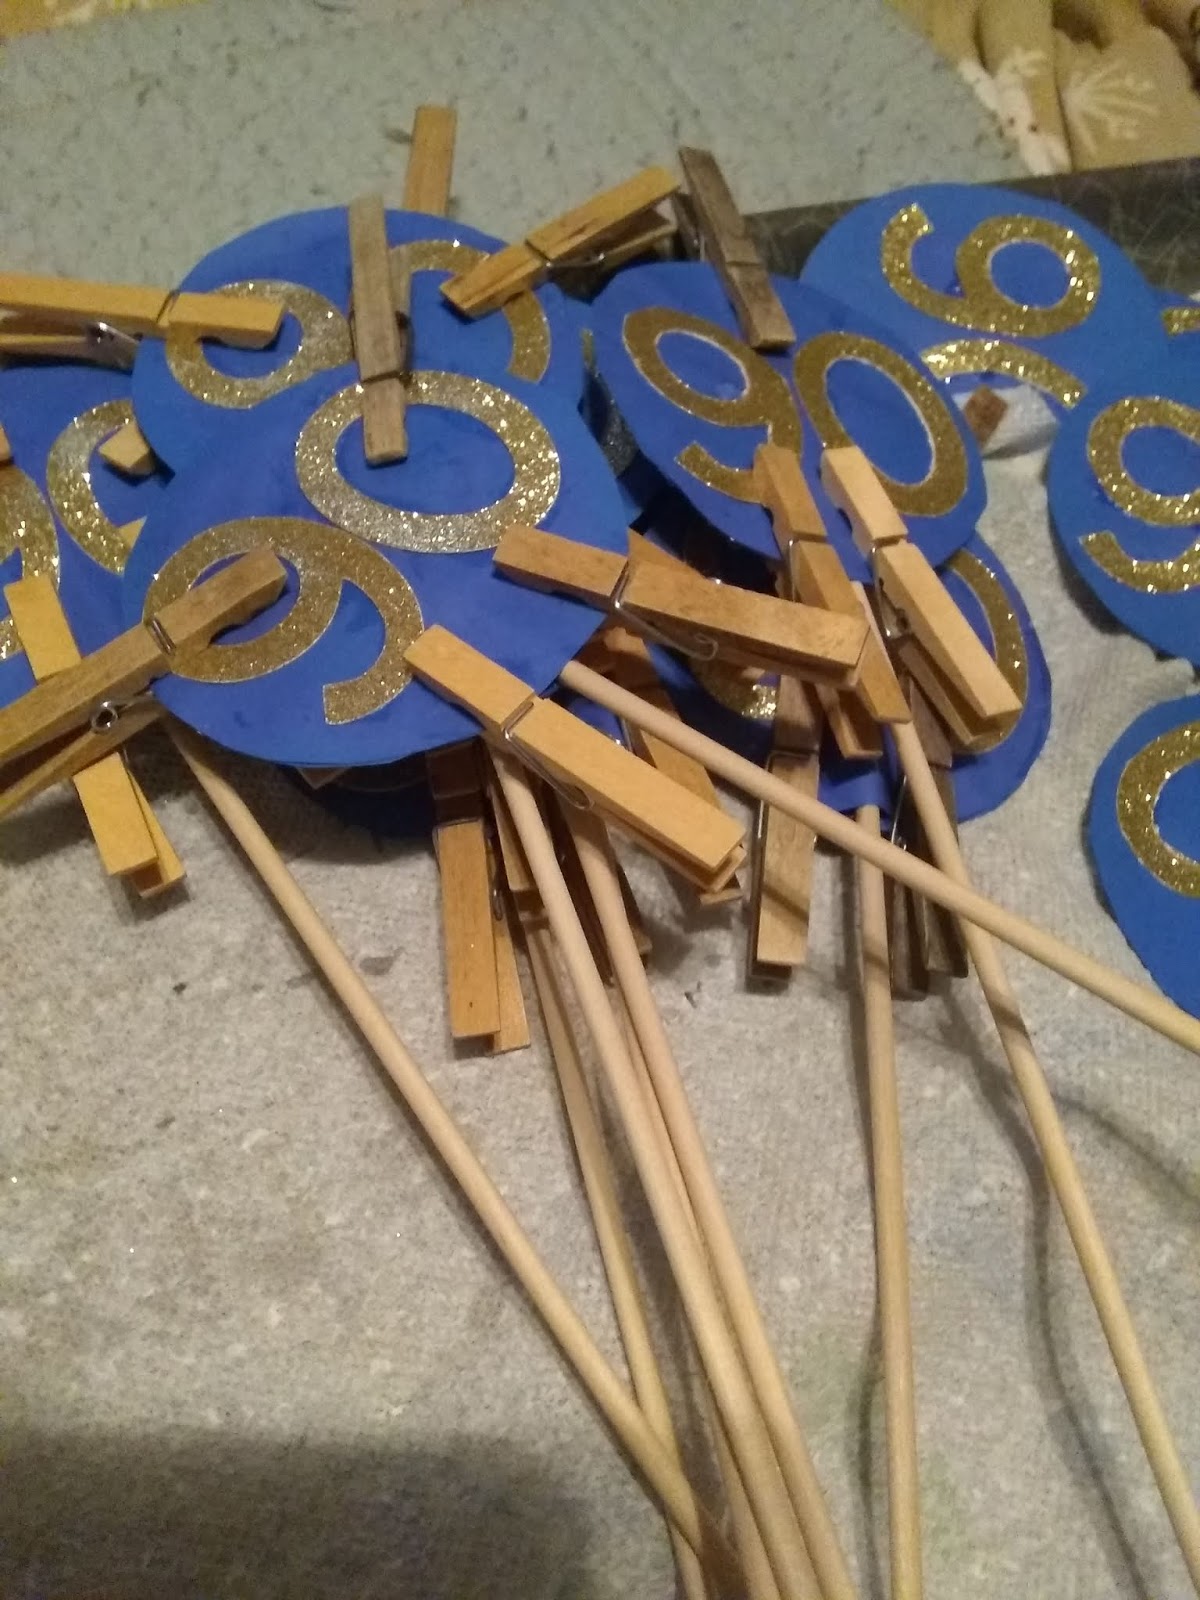
  My "90" PICK


The picks were being  clamped overnight to  make sure they stayed together, clothespins were very useful. 


I was able to borrow the centerpieces and added the picks I made!!  I ordered the silk runners online and they looked so bright and beautiful. Used table glitter -- it was so cute!!!!   BUT,  wished I had NOT, it is very hard to clean up.   


Hobby Lobby was my favorite store and I took advantage of scrapbook paper sales and the coupon I downloaded from their website!!   The Gold glitter  paper was very thick and hard for the cricuit to cut, had to change the blade, but it was  worth it!!!  Love they way they sparkled!  It took a long time, had to cut a 9 and a 0 for the back and front, glue numbers on circle, then glue the two circles together over a dowel (or chopstick!)   I think we ended up doing 48 picks.  We used every glue I had in the house, guess what ?  Plain white glue did best, even better than glue gun!!!

The final product!!!!  They were beautiful!!


I really wanted "fun" stuff at the party and saw some "90" glasses on the internet.. but golly gee, could I make them???  It was a little harder than I thought it would be, but only took about two nights to make them. 
I bought generic plastic glasses at my local store.... less than $5.. 
Popped out the lens, pop, pop, pop!!
Traced around the frame for a  template of the shape... 
Designed  my "90" making sure they were joined together in the middle.   Cut the front out of scrapbook paper, then glued that to cardboard, added some blue glitter stars on the sides and then glued  it to the glasses!!!     Used my handy clothes pins to keep together overnight while the glue dried

The final produce!!!  
Practice run!! 
My test  run!!

BANNERS!!  BANNERS! BANNERS! 


I was so happy the way the banners turned out , I took this one outside to see how it would look hanging up!!!  I loved using different fonts and colors ... 

The Fueling Station was the punch, tea and coffee table   We had a Railroad theme for the party and it was a big hit!!

I made  about four banners to hang in the church hall where we had the party.   I think they turned out great!!!  Cut the letters on Cricuit and cut the rectangles out, glued the letters on the rectangles, punched small holes in the top and stung them up with hemp- type string.  Tried yarn, but it was too flimsy. I have some more banner pics, but will find photos later.


I didn't know when to stop!!  My husband was always asking me if I was done!!  :) I got started planning in July for a December Party.   It was so fun and got to see a lot of family!!!  We had probable 80  people there!!! And about 10 people had to cancel the day of  due to emergencies.. 


Tuesday, December 31, 2019

My new Hobby-- Loom knitting hats

I recently picked up a new hobby- loom knitting!  Not sure how I missed it before, the hats are done quickly and easily and turn out beautifully!!  I had seen a loom knit hat at a local craft show and the lady running the booth showed me her loom and how she was working a new hat. 

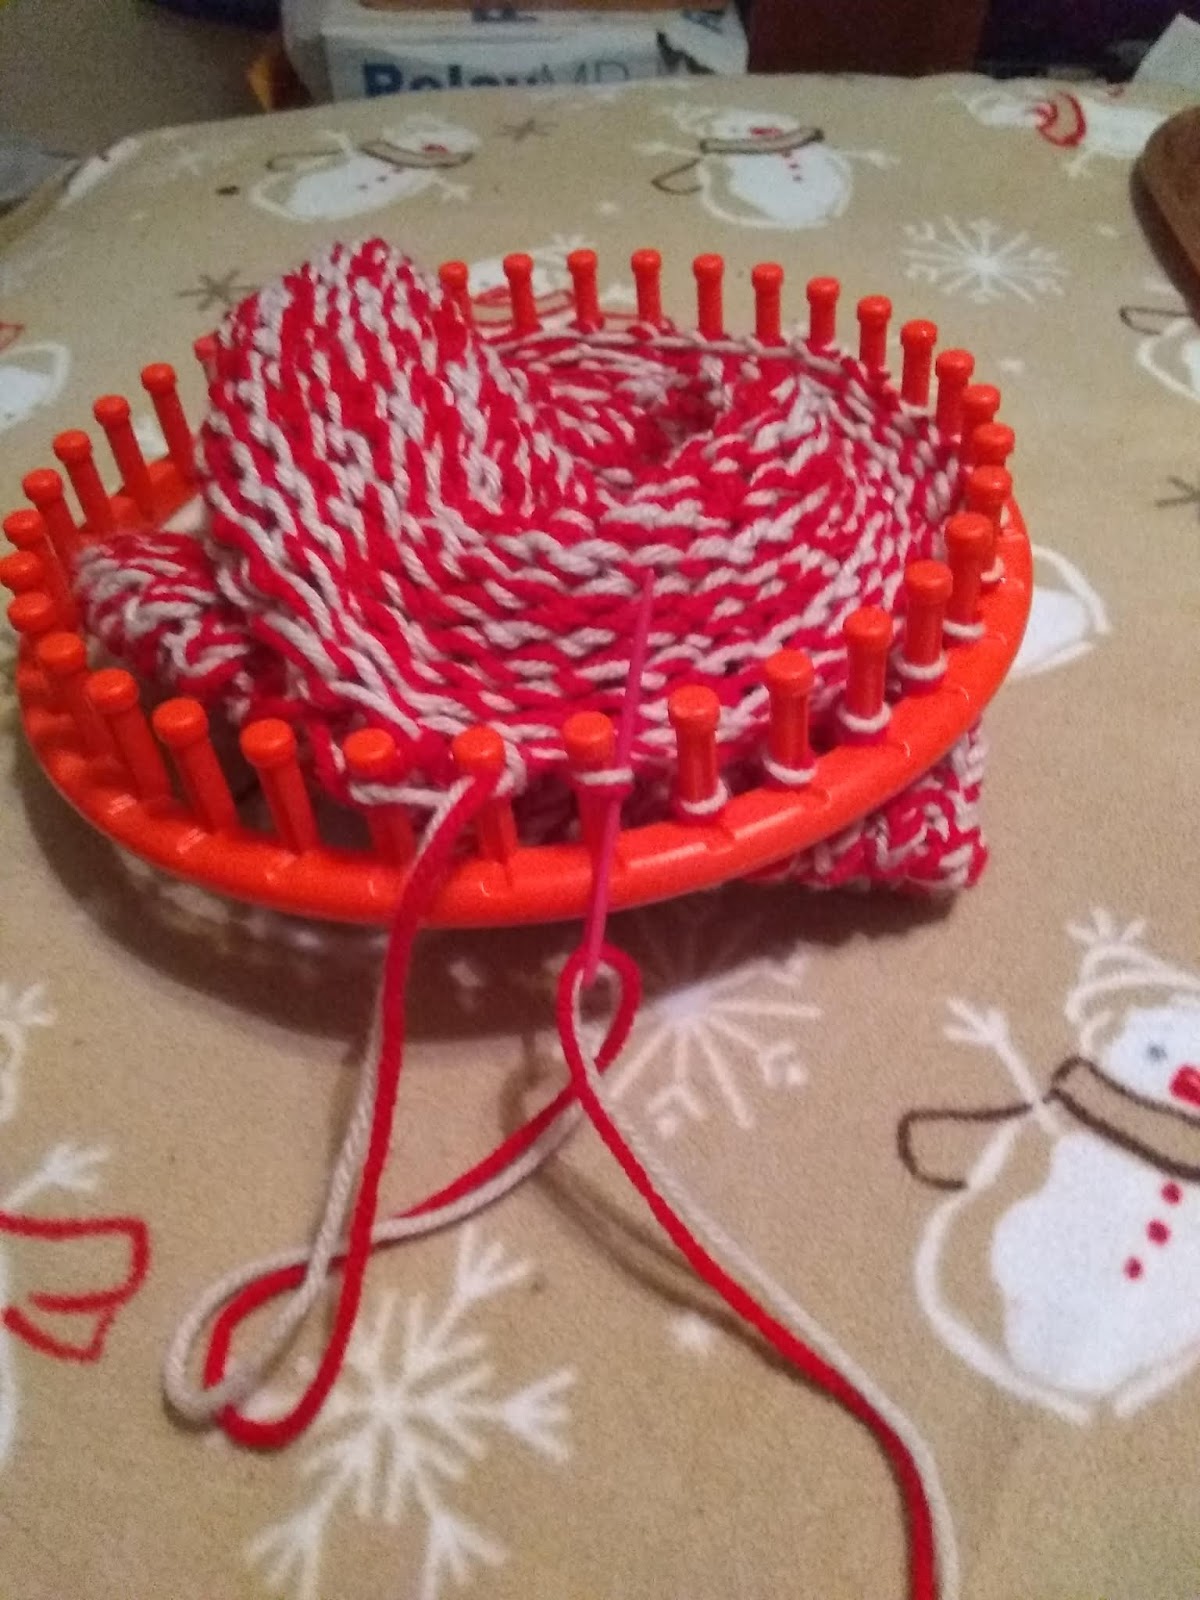
So, armed with my handy dandy Michael's 50% off coupon headed out and got myself a Knit Quick Knitting Loom Set by Loops & Threads.   I have tons of yarn at home, so my first round was with some red and beige Red Heart yarn from the closet.    The kit came with four different sizes, I used the orange loom, the second largest size (9.5 inch/24cm.)  the other sizes were 5.5 inch, 7.5 inch and 11.3 inch.


I am no expert, but here is my condensed version of how to make a hat.  There are plenty of videos out there if you need more information..     

I used two strands of yarn together, my red/beige combo.   

Start by slip knot and attach the yarns to the side peg, then wrap the yarn around each peg in an "e" all the way around, then continue around a second time so each peg has two loops (of the red/beige combo loop) on it.  Then I used a clothespin to secure the yarn ends so it does not unravel. Then using the hook provided in the kit, slide the lower two loops over the top two loops, up and over  to the middle.. leaving one red/beige loop on the peg.. do this all the way around.   This makes a row of "Knitting."  Repeat .. these two steps over and over... 

I ended up doing my counterclockwise, but you could do it clockwise.   

If you want a brim, and I do like the way the brim looks, that takes a few extra steps.  So once you do enough rows to measure about 3 inches ( or however twice as big as you want the brim to be) go inside the loom and bring up the first row and place the loop from the bottom row over the corresponding peg, then the second loop on the next peg and so on.  This folds up the bottom to form the brim.  Then pull the bottom loop over the top loop all the way around, the continue looming until you get it big enough.  I did mine about 9 inches long.


ENDING---Once big enough/long enough,  measure out about 18 inches of yarn and cut it.  Using a plastic craft needle on the yarn, use the yarn and  slide the needle under the yarn loop and up through the first red/beige combo loop.  Then next stitch then continue all around.  You can lift the loop off the peg once it it threaded.  At the end, pull the yard through to the inside and pull to tighten up the top of the hat and secure with square knot and weave in the ends.  Make your pom-pom and apply!!!    


I liked it so much, while my first love is crochet, if you want something with no counting or keeping up with stitch changes, this if for you!  I liked it so much, I made a blue one of some soft yarn that I had used some for Baby items.  I used two strands again.  It was soft, but not as thick or firm as the first one.   If feels a little flimsy to me, but looks great.  I didn't time how long it took, but started one evening and finished the next evening after work.    I really want to try one strand of bulky yarn and have purchased aqua colored Yarn Bee super bulky "6" weight.    I can't wait to get started.. 

 Let me know what you think!  


Friday, December 30, 2016

"Free" Sewing Machine

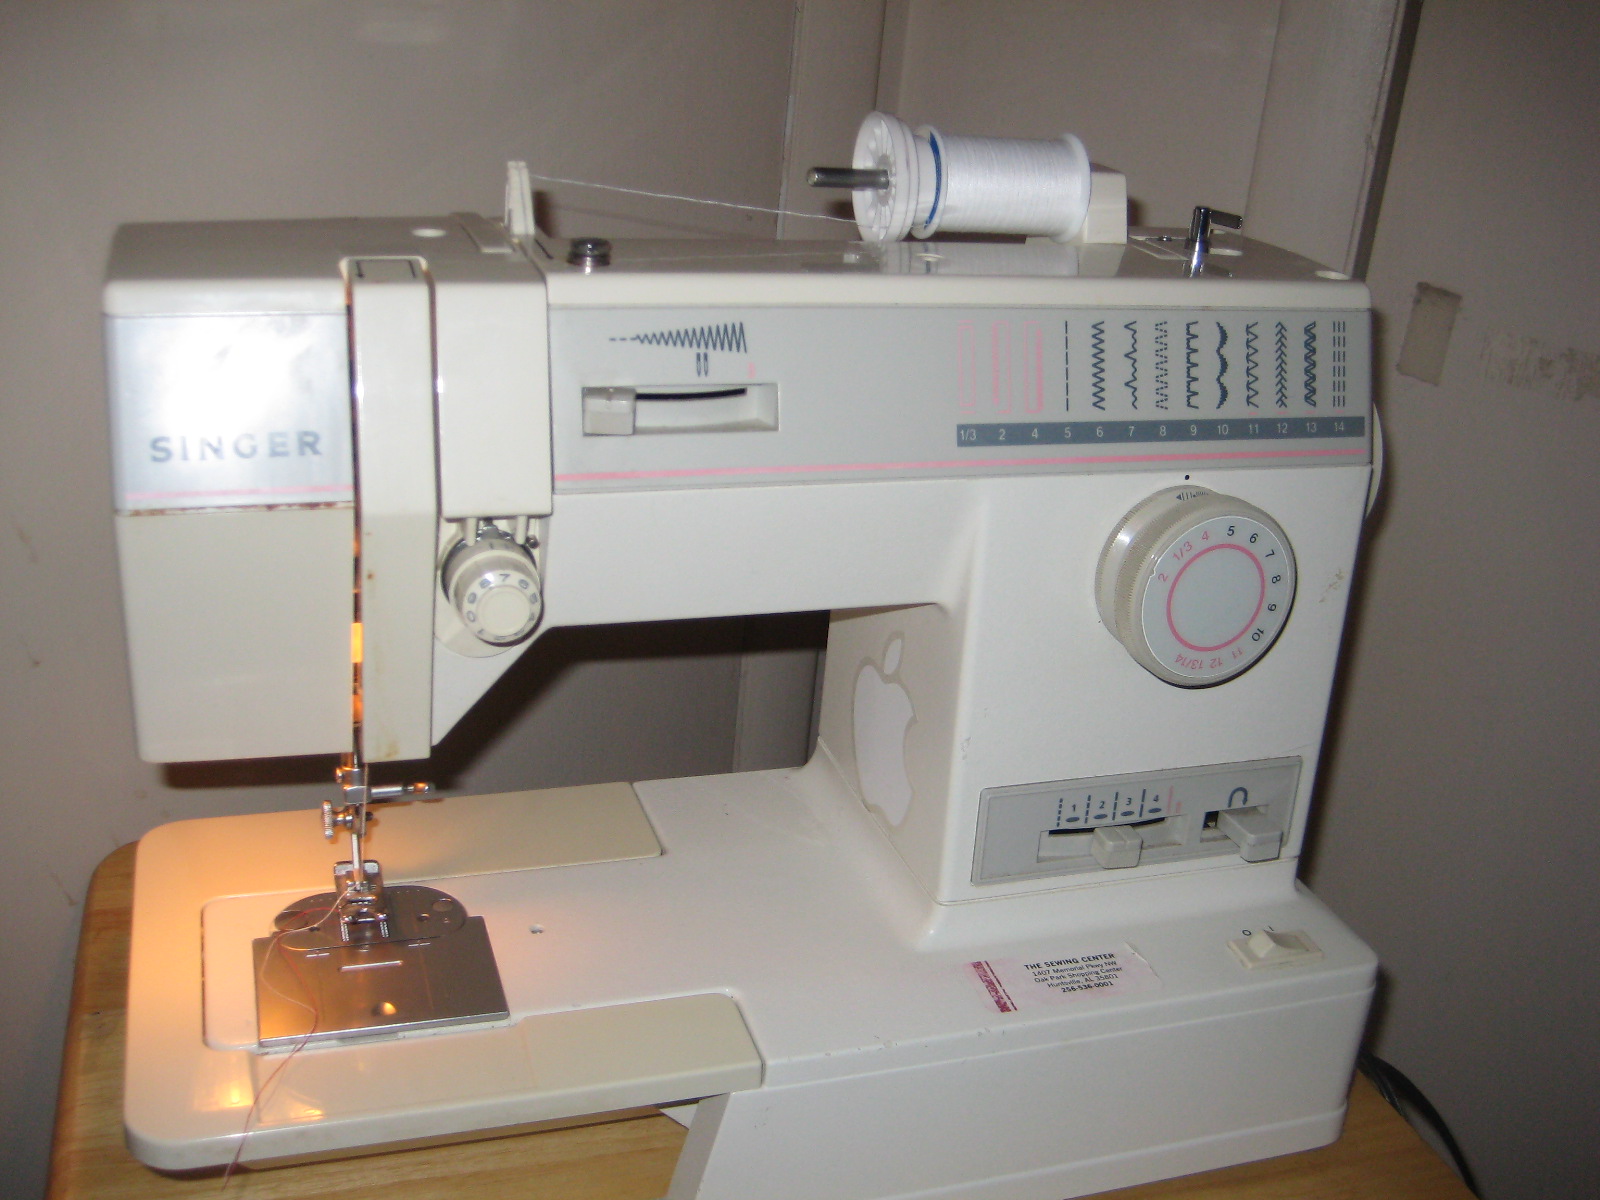
 Got a free Sewing Machine

Three days ago, when I got home from work, my husband said, "I think there is a sewing machine on the street a few blocks over. What do you think, should we go get it?" Surely not anything any good, but we went and got it - machine and the cabinet, too. The cabinet legs were wobbly (solved be a few turns of the wingnuts) and the machine looked grimy and dusty. Took cabinet legs off to take home. Of course no one would leave a good sewing machine on the street with chair a...nd couch, right?? Got it home-cleaned it up and plugged it in, the light came on!! Yeah! The needle moved! Yeah!! Wait, that was a steady quiet hum, no hurky -jerky noises. Then I got a material scrap and looked up how to thread it (have not had a top load bobbin before) and let her go-- it did not miss a stitich!!! Wow-- what a find. Was able to google an instruction booklet online. A girl can always use another Sewing machine, right?? I have the best hubby. Now to find a place for it..


The cabinet


Thursday, February 6, 2014

Houndstooth Scarf

I found a cute pattern for Houndstooth scarf and being from 'Bama could not resist!


It was easy to make and took about 4 or 5 evenings.  If make again, will use a more softer yarn.

Here is a link to the pattern:  http://elkstudiohandcraftedcrochetdesigns.com/2013/01/23/excited-about-crochet-patterns/ 

Saturday, January 4, 2014

I had and idea for the container our fruit came in.   I bought a recipe book at the thrift  store for a dollar.  Removed as many nails from the wooden container. The Modge Podged pages I removed from the recipe book onto the inside and outside of the container.  I just used lots of colorful desserts mainly.  Just cut them out, mostly geometric shapes. I just fit it as I went, just knew I wanted the chocolate cake on the bottom and the strawberries on the front!!!   [ Next time, I will do the edges and corners first with smaller pieces, then add the bigger pieces to the sides and bottom.]  Then, over several days, I applied several layers of Modge Podge. 


 Cutting up my thrift store book.


Finished product!!

I had fun doing this, and would do it again.  Now to figure out what to do with this.  Right now, I put my Tupperware lids in it to keep them organizied.


Staf Fish Dishcloth --

Easy to make, made two in different colors for my sis-in-law.  They live in FL, so perfect décor for there!!


Want to make some more!!!

Baby Bibs --these are several I've made for friends who have babies!!

Teddy had to try on!!
 
For Brittany at work
 

For Brittany at work


TWINS!!


For Cora at work!!


For Carolyn at church..


Now that we know the baby's name!!!


Refinsihed table -Bird design

Got this at a local thrift store.  It was in fair shape.   Cleaned it up, lightly sanded.

First the white paint, rethinking should have done Kilz. then painted. Took several coats.


Tape Bird template in place (Michaels)

Get acrylic paint in blue and stencil brushes ( had stored in garage.)

Apply paint with stencil brush.  After you load your brush with paint, dab on paper towels so you don't have too much on your brush.  Start on one edge on stencil, work over the wood and go from there to fill in  the rest of the stencil.  You can make as light or dark as you want.   I  liked my darker.  If you want sharp corners, make sure your press down on the stencil near there when applying the paint. Resist the urge to 'check' under the stencil.  When completed, carefully lift off stencil.   I wash mine with dish detergent to keep it somewhat clean/    


I repeated on the bottom shelft.


I applied several layers of Mod Podge over the shelves

The final results!!

Another view

Tulip Wreath

 I made a tulip wreath.  Metal wreath- Dollar Tree, Ribbon- (needed 2) -Walmart Tulips - Hobby Lobby Green mesh(already had at home in craft...